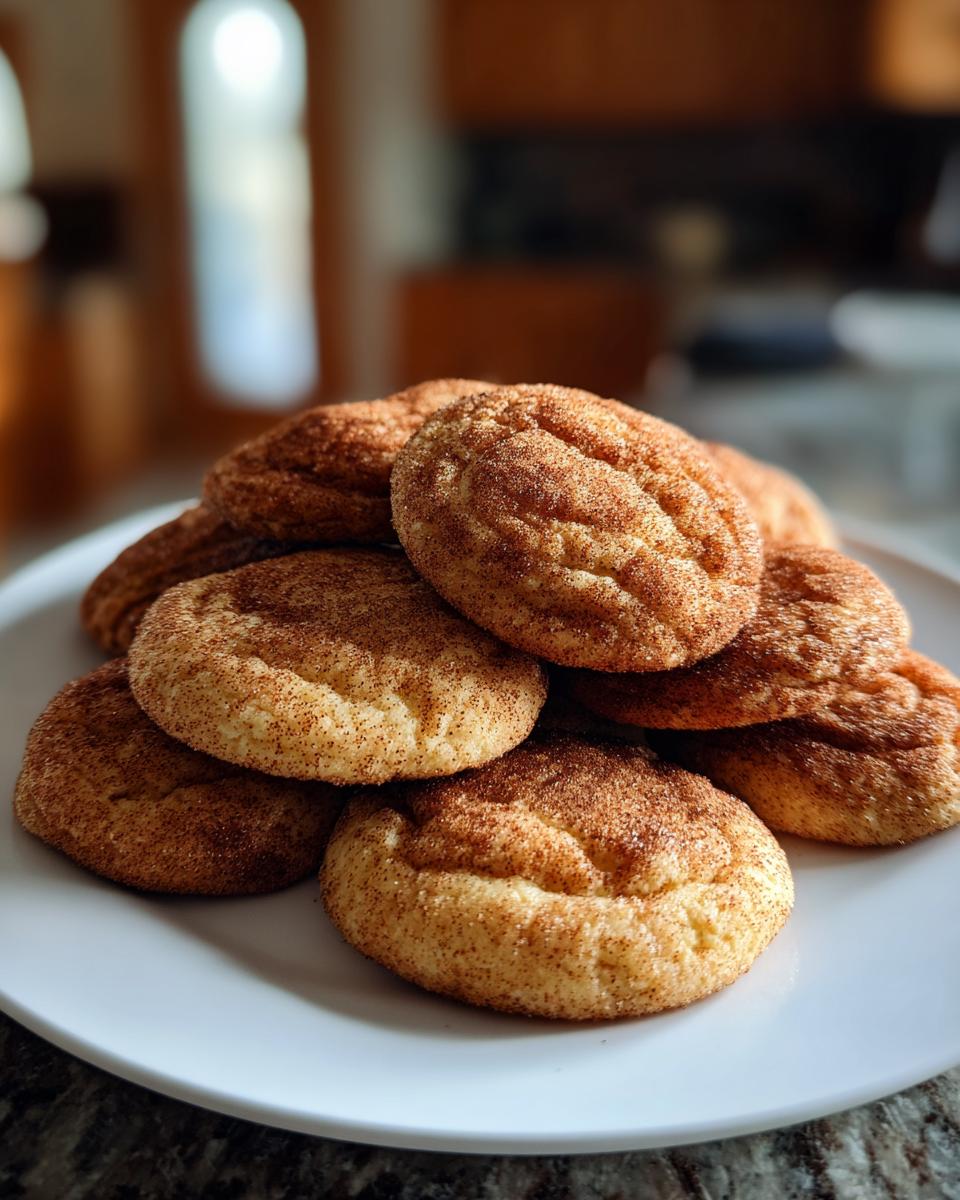
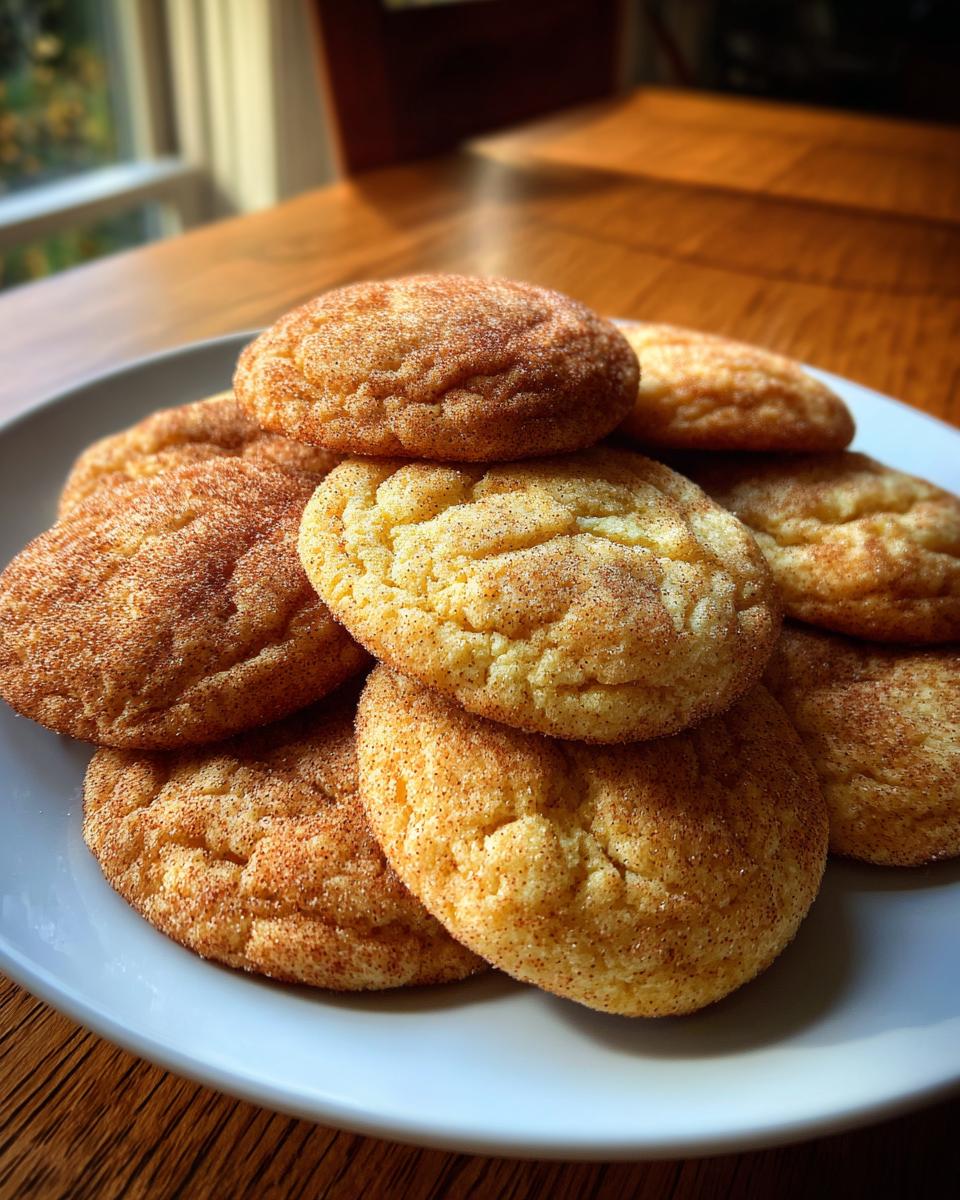
Okay, I’ll admit it—I’ve always been a sucker for snickerdoodles. There’s something about that cinnamon-sugar hug around a soft, chewy cookie that just feels like home. But when I went vegan, I thought my snickerdoodle days were over. Boy, was I wrong! After months of tweaking (and maybe a few cookie casualties), I finally nailed the perfect Soft & Pillowy Vegan Snickerdoodles—with a gluten-free option that’s just as dreamy.
These aren’t just “good for vegan” cookies. They’re the kind of cookies you’d sneak from the cooling rack because the smell is too good to resist. The secret? A magical combo of coconut oil and almond milk that creates that signature pillowy texture we all crave. And don’t even get me started on that crackly cinnamon-sugar crust—it’s like a little party in every bite.
What I love most (besides eating them, obviously) is how foolproof they are. Whether you’re vegan, gluten-free, or just someone who appreciates a darn good cookie, this recipe’s got you covered. My niece—who’s convinced all vegan food is “weird”—actually asked for the recipe after trying these. That’s when I knew I had to share them with you.
Why You’ll Love These Soft & Pillowy Vegan Snickerdoodles
Listen, I wouldn’t share just any cookie recipe with you—these snickerdoodles have passed the ultimate test with flying colors. Here’s why they’ve become my go-to treat for everything from holiday cookie swaps to “I need a snack NOW” emergencies:
- That dreamy texture we all crave: Unlike some vegan cookies that turn into hockey pucks, these stay soft and pillowy for days (if they last that long!)
- Seriously easy to make: No fancy equipment needed—just one bowl and about 20 minutes from start to fresh-from-the-oven bliss
- Allergy-friendly magic: Vegan? Check. Gluten-free option? You bet. (My cousin’s celiac and she swears by the GF version)
- Crowd-pleasing charm: I’ve served these to skeptical omnivores who couldn’t believe they’re dairy-free
- That nostalgic cinnamon-sugar hug: The crispy sugar shell gives way to the softest center—it’s like childhood but better
Honestly? The hardest part is waiting those agonizing five minutes after they come out of the oven. But trust me, that first warm, cinnamony bite is worth every second.
Ingredients for Soft & Pillowy Vegan Snickerdoodles
Here’s the beautiful thing about these cookies—you probably have most of this stuff in your pantry right now! But there are a few little tricks with the ingredients that make all the difference between “good” and “oh-my-god-give-me-the-whole-batch” snickerdoodles.
- 1 3/4 cups all-purpose flour – Or use your favorite 1:1 gluten-free blend (I love King Arthur’s for this). Spoon and level it—don’t scoop straight from the bag!
- 1/2 tsp baking soda – Not baking powder! This gives just the right lift without making them cakey.
- 1/4 tsp salt – Trust me, you need this to balance the sweetness. I use fine sea salt.
- 1/2 cup coconut oil, softened – Key word: softened, not melted! It should be the texture of room temp butter. I leave mine out for about 30 minutes before baking.
- 3/4 cup granulated sugar – Regular white sugar works best here for that classic crackly top.
- 1/4 cup almond milk – Any plant milk works, but almond gives the best neutral flavor. Shake the carton well!
- 1 tsp vanilla extract – The good stuff makes a difference. I splurge on Mexican vanilla for these.
- 2 tbsp sugar + 1 tsp cinnamon – For rolling. I mix this in a shallow bowl while the oven preheats.
See? Nothing weird or hard to find. Now let’s turn this simple lineup into cookie magic!
How to Make Soft & Pillowy Vegan Snickerdoodles
Okay, let’s get to the fun part—turning these simple ingredients into cookie perfection! Don’t let the vegan label fool you; this dough comes together just like traditional snickerdoodles. I’ll walk you through each step so you get those signature soft centers and crispy cinnamon-sugar edges every time.
Step 1: Mix Dry Ingredients
First things first—preheat your oven to 350°F (175°C) and line your baking sheet with parchment paper. Now grab a medium bowl and whisk together:
- 1 3/4 cups flour (all-purpose or GF blend)
- 1/2 tsp baking soda
- 1/4 tsp salt
Whisk until you stop seeing any little baking soda lumps—this takes about 30 seconds. Set this aside while you work on the wet ingredients. Pro tip: I like to sift my flour if it’s been sitting awhile, but it’s not strictly necessary.
Step 2: Cream Wet Ingredients
In a large bowl, add your softened coconut oil and granulated sugar. Here’s where you’ll want a hand mixer or stand mixer (though a strong arm and wooden spoon works too!). Beat them together for about 2 minutes until light and fluffy—you’ll know it’s ready when the mixture lightens in color slightly.
Now add:
- 1/4 cup almond milk
- 1 tsp vanilla extract
Mix just until combined—about 30 seconds more. The batter might look a little curdled at this point; that’s totally normal! The flour will bring it all together.
Step 3: Combine & Roll Dough
Time to marry your wet and dry ingredients! Gradually add the flour mixture to the wet ingredients, mixing on low speed (or by hand) just until no dry streaks remain. The dough will be soft but not sticky—if it’s too wet, add 1 tbsp more flour.
Scoop about 1 tbsp portions and roll between your palms to make smooth balls. Roll each ball in your cinnamon-sugar mixture until fully coated. Place them about 2 inches apart on your prepared baking sheet—these babies spread just enough!
Step 4: Bake to Perfection
Slide those beauties into your preheated oven and bake for 10-12 minutes. You’re looking for:
- Edges just starting to turn golden
- Centers that look slightly underdone (they’ll set as they cool)
- That irresistible cinnamon-sugar crust forming
When you pull them out, resist the urge to move them immediately! Let them cool on the baking sheet for 5 minutes—this helps them set without crumbling. Then transfer to a wire rack to cool completely… if you can wait that long!

See? Told you it was easy. Now try not to eat them all in one sitting—I dare you!
Tips for Perfect Soft & Pillowy Vegan Snickerdoodles
After making approximately a zillion batches of these cookies (okay, maybe just dozens), I’ve picked up some tricks that’ll take yours from good to bakery-quality amazing. Here’s what I’ve learned the hard way so you don’t have to!
- Coconut oil temp is EVERYTHING – Too melted and your cookies will spread into pancakes; too firm and they won’t cream properly. Aim for the texture of softened butter—when you press it, your finger should leave an indent without sinking in.
- Patience pays off – I know it’s torture, but letting the cookies cool on the baking sheet for those 5 minutes makes them sturdy enough to move without falling apart. The centers continue cooking from residual heat too!
- Storage secrets – Keep them in an airtight container with a slice of bread. The bread gets stale while the cookies stay soft for days (though let’s be real—they never last that long in my house).
- Bake in batches – If making multiple sheets, rotate pans halfway through for even baking. And never put dough on a hot baking sheet—it makes the bottoms cook too fast!
Follow these tips, and you’ll be the snickerdoodle hero of your next potluck—just don’t blame me when everyone begs for the recipe!
Gluten-Free Option for Soft & Pillowy Vegan Snickerdoodles
Good news for my gluten-free friends—these snickerdoodles transform beautifully with a simple swap! I’ve tested this recipe with several gluten-free flour blends, and here’s what works best:
- Use a 1:1 gluten-free baking blend (like King Arthur’s or Bob’s Red Mill) instead of all-purpose flour—no other changes needed!
- For extra insurance, add 1/2 tsp xanthan gum if your blend doesn’t already include it (this helps mimic gluten’s binding power).
- The dough might feel slightly stickier—just chill it for 15 minutes before rolling if needed.
Honestly? My gluten-loving husband couldn’t tell the difference between the regular and GF versions—they’re that good!
Storing & Reheating Soft & Pillowy Vegan Snickerdoodles
Here’s the beautiful thing about these cookies—they stay soft for days if you store them right! I always use an airtight container with one of those nifty locking lids (or just a good ol’ cookie tin). Pop them in at room temperature, and they’ll stay pillowy-perfect for up to 5 days.
Want to bring back that fresh-from-the-oven magic? Just microwave a cookie for 10-15 seconds—the sugar coating gets all melty, and the center turns into a warm, gooey dream. For bigger batches, I’ll sometimes reheat them in a 300°F oven for 3-4 minutes. Pro tip: Tuck a slice of bread in the container—it absorbs excess moisture and keeps your snickerdoodles from drying out!
Nutritional Information for Soft & Pillowy Vegan Snickerdoodles
Okay, let’s be real—we’re not eating snickerdoodles for their health benefits. But it’s still nice to know what you’re enjoying, right? Here’s the scoop on one delicious cookie (based on my standard recipe):
- Calories: 90
- Sugar: 8g
- Sodium: 50mg
- Fat: 4g (3g saturated)
- Carbs: 13g
- Protein: 1g
Now here’s my disclaimer (because I’m nothing if not honest): These numbers are estimates that can change based on your exact ingredients. Different flour brands, coconut oil types, or sugar varieties will tweak the counts slightly. The gluten-free version tends to be a tad higher in carbs but otherwise pretty similar.
But let’s be honest—when you’re biting into that cinnamon-sugar heaven, are you really counting grams? I didn’t think so. Enjoy every guilt-free bite knowing these treats contain no cholesterol or animal products—just plant-based goodness with a side of nostalgia!
FAQs About Soft & Pillowy Vegan Snickerdoodles
I get asked about these cookies ALL the time—usually with someone’s mouth full mid-bite! Here are the answers to the most common questions that pop up (along with some sneaky tips I’ve picked up along the way):
Can I use butter instead of coconut oil?
While you can use vegan butter, coconut oil really is the MVP here! Its unique fat structure creates that perfect pillowy texture. If you must swap, use 1/2 cup softened vegan butter (the stick kind, not tub) and reduce almond milk to 2 tbsp—but expect a slightly denser cookie. Pro tip: Miyoko’s or Earth Balance work best for baking!
How do I make these nut-free?
Easy peasy—just swap the almond milk for oat milk or soy milk. Both work beautifully without altering the texture. (This is how I make them for my nephew’s school events.) The cookies will taste identical—that cinnamon-sugar magic hides any milk flavor!
Why did my cookies spread too much?
Ah, the dreaded pancake cookie! Usually this means your coconut oil was too melted. Next time: 1) Make sure it’s just softened, 2) Chill dough 15 mins before baking, and 3) Use a light-colored baking sheet (dark pans cook bottoms faster). If all else fails, add 1-2 tbsp extra flour to the dough.
Can I freeze the dough?
Absolutely! Roll unbaked balls in cinnamon sugar, freeze on a tray, then transfer to a bag. Bake straight from frozen—just add 1-2 extra minutes. They’ll taste just as fresh! (I always keep a stash for last-minute cookie emergencies… not that I’d know anything about those.)
Are these cookies okay for kids?
Totally! They’re school-safe if you use nut-free milk, and the simple ingredients mean no weird additives. My 4-year-old niece calls them “cinnamon clouds”—and she’s usually the pickiest eater I know. Just watch out for sugar highs from all that cinnamon-sugar joy!
Share Your Soft & Pillowy Vegan Snickerdoodles
Okay, friend—now it’s your turn! I’ve spilled all my snickerdoodle secrets, and I can’t wait to hear how yours turn out. Did they get that perfect crackly sugar crust? Did your kitchen smell like a cinnamon roll factory (in the best way possible)? Snap a pic of your cookie masterpiece and tag me—I live for those golden-brown success stories!
Got a genius tweak? Found the perfect gluten-free flour blend? Ran into a cookie crisis? Drop a comment below so we can troubleshoot together. Your tips might just help another baker nail their perfect batch. And if you loved these as much as I do, pay it forward—share the recipe with that friend who “doesn’t believe” vegan cookies can be amazing. (We’ll convert them yet!)
Happy baking, and may your cookie jar always be full of pillowy, cinnamon-sugared joy!
Print
Super Soft Vegan Snickerdoodles – 3 Secrets for Perfection!
- Total Time: 22 minutes
- Yield: 24 cookies 1x
- Diet: Vegan
Description
Soft and pillowy vegan snickerdoodles with a gluten-free option. These cookies are easy to make and perfect for any occasion.
Ingredients
- 1 3/4 cups all-purpose flour (or gluten-free flour blend)
- 1/2 tsp baking soda
- 1/4 tsp salt
- 1/2 cup coconut oil, softened
- 3/4 cup granulated sugar
- 1/4 cup almond milk
- 1 tsp vanilla extract
- 2 tbsp sugar (for rolling)
- 1 tsp cinnamon (for rolling)
Instructions
- Preheat your oven to 350°F (175°C) and line a baking sheet with parchment paper.
- In a bowl, whisk together flour, baking soda, and salt.
- In a separate bowl, beat coconut oil and sugar until creamy.
- Add almond milk and vanilla extract to the wet mixture, stirring well.
- Gradually mix the dry ingredients into the wet ingredients until combined.
- In a small bowl, mix sugar and cinnamon for rolling.
- Scoop dough into 1-inch balls, roll in cinnamon sugar, and place on the baking sheet.
- Bake for 10-12 minutes until edges are lightly golden.
- Let cool on the baking sheet for 5 minutes before transferring to a wire rack.
Notes
- For best results, use softened but not melted coconut oil.
- Let cookies cool slightly before eating—they firm up as they cool.
- Store in an airtight container for up to 5 days.
- Prep Time: 10 minutes
- Cook Time: 12 minutes
- Category: Dessert
- Method: Baking
- Cuisine: American
Nutrition
- Serving Size: 1 cookie
- Calories: 90
- Sugar: 8g
- Sodium: 50mg
- Fat: 4g
- Saturated Fat: 3g
- Unsaturated Fat: 1g
- Trans Fat: 0g
- Carbohydrates: 13g
- Fiber: 0g
- Protein: 1g
- Cholesterol: 0mg